 When I look at the Sichuan news everyday, I feel sorry to hear about the increasing number of people died and injured. Since I can't contribute anything so far, I would like to use my creation to send my condolence and regret to all the victims.
Im quite admire for those who can create an interesting things. For example: I like the Martha Stewart show very much. Seriously, she can do so many fantastic artwork. She is my mentor....as what im doing now.
Now, I would like to introduce my creation- handmade roses. There are many ways to do a paper rose, but i found a new method and it is simple to do. Try it now......
 You need to prepare some material for this paper art:
1. Double side tape
2. Green sticky tape ( can buy from most of the art centre)
3. Green wire (25Psc x 36cm) code: SWG 22
4. A cardboard ( 7.5 x7.5 cm)
5. Some artificial accessories ( leaf, berries)
6. Colour paper ( any color that you think suitable)
Try to feel the papers have this propotion
Hardness : Softness
65:35
Try to feel the texture of the paper also.
7. Needle
8.Scissors
9.Cutter
 This is the example of the berries that I bought from Petaling Street, Malaysia. Not so expensive. Around RM10 for 30 units ( 3 years ago). Haha.
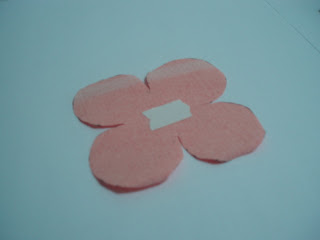
 Make a hole in the middle of the shape and ready to use.
 Take a green wire.
 Make this in one side of the wire. This shape is use to stabilize and support the base of the rose.
 Put the first layer of the rose in the green wire. Stick the patels and the green wire together.
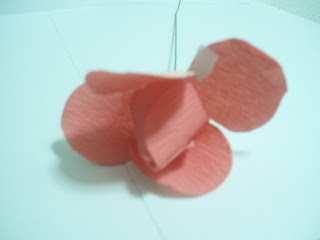
 Follow this step carefully. The is the most important step of making rose. Twist the petal one by one into the middle. Each petal is in the overlapping condition.
 Make it closer as what I shown in the picture.
 Stick the petal by using double side tape. Make sure your work is neat and try to avoid someone can see your double side tape. You can use the paper glu also. But i prefer using this double side tape- faster and clean.
 Put a double side tape at the centre of the second layer of the rose.
 Put the second layer inside the green wire again. Stick the middle of the layer at the base of the first layer.
 Your work should be look like this now. Make a little curve at the border of each petal by using pencil or needle. Feel the shape of the real rose.
 Repeat the same proses for third layer.
 If you want to continue, add one more layer. Remember to put a double side tape at the middle at each layer so that each layers are stick together.
 There is a different at this layer compare to the previous one. The double side tape should put at the middle at the petal. Then stick the petal to the previous layer...not side by side.
 Yeah... The rose complete already.If you cannot get this shape, no worries, more pratice..make perfect.
Final product.
Sorry for the picture that i took for this creation- blur ...haha
Im not a good photographer...
Kindly leave a comment......You are welcome to do so...Thx
Sorry for the picture that i took for this creation- blur ...haha
Im not a good photographer...
Kindly leave a comment......You are welcome to do so...Thx


2 comments:
hey.. very talented in handicraft! .. very sweet rose there.. ;)
thx o..I like to do handicraft..
Post a Comment